
Removing a mechanical thumb from a John Deere excavator is an usual upkeep or reconfiguration task calling for mindful preparation, correct tools, and stringent adherence to safety protocols. This procedure involves detaching hydraulic features and literally removing the thumb assembly from the excavator’s dipper stick. Always seek advice from the details John Deere Procedure and Maintenance Guidebook for your equipment model and serial number before starting any type of job, as treatments and requirements can vary substantially. Failing to follow supplier standards can result in injury or tools damages.
(how to take a mechanical thumb off a john deere excavator)
Security is extremely important. Park the excavator on firm, degree ground. Involve the hand brake. Reduced the container and thumb totally to the ground to soothe hydraulic stress and maintain the machine. Shut down the engine completely. Depressurize the hydraulic system by gradually moving all control levers with their complete series of motion several times with the engine off. This action is vital to stop unexpected movement or high-pressure oil release. Set up the safety lockout bar or involve the hydraulic lockout system according to the manual. Place wheel chocks securely. Use ideal individual safety equipment, including safety glasses, gloves, and steel-toed boots. Recognize the considerable weight of the thumb assembly; lifting devices ranked for the load needs to be readily available and appropriately positioned before disconnection begins. Ensure the work area is clear of personnel not straight associated with the task.
The initial technical phase involves separating the thumb’s hydraulic circuit. Identify the hydraulic pipes linked to the thumb cyndrical tube(s). Generally, 2 pipes per cylinder (stress and return) are present. Area appropriate containers below the tube connection points to record any type of recurring hydraulic oil. Very carefully clean the area around the hose fittings to avoid contamination access. Utilizing the correct dimension wrenches, loosen the hose installations at the cylinder ports. Be gotten ready for small oil leak. When loosened up, completely detach the pipes. Quickly cap or plug both the hose ends and the cyndrical tube ports making use of clean, compatible plugs or caps. This avoids contamination of the hydraulic system and the setting. Safeguard the detached hose pipes safely far from the work area to prevent damages or tripping dangers. If the thumb makes use of pilot control lines or other supplementary links, recognize and detach these likewise, topping all open ports.
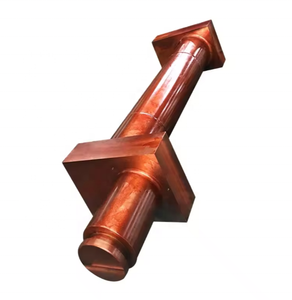
The mechanical detachment calls for accuracy. The thumb assembly is secured to the dipper stick via large pivot pins. Determine the particular retention device for these pins. Usual approaches include big screws threaded into the end of the pin, external snap rings seated in grooves, or caretaker layers bolted over the pin finishes. Situate and get rid of these keeping elements using proper tools like huge wrenches, break ring pliers, or socket collections. Extensively clean the subjected ends of the pivot pins and the surrounding employer locations on the dipper stick installing brackets. Apply passing through oil to the pin ends and permit time for it to work if rust is believed. Setting the lifting equipment (crane, hoist, or excavator with lifting attachment) firmly. Connect lifting slings or chains rated for the thumb’s weight to the designated training factors on the thumb assembly. Apply small tension to the training tool to take the weight off the pins without raising the thumb cost-free. Utilizing an appropriate drift punch and a heavy hammer, or ideally a hydraulic pin pusher if readily available, carefully drive the pivot pins of one side. Assistance the pin as it arises to prevent dropping. Repeat the process for any kind of continuing to be pins protecting the thumb. Once all pins are completely removed, thoroughly raise the thumb assembly free from the dipper stick installing braces using the lifting equipment. Relocate the thumb slowly and intentionally to a protected, marked storage area and reduced it safely.
(how to take a mechanical thumb off a john deere excavator)
Wrap up the procedure by carrying out a complete post-removal assessment. Check out the revealed installing braces on the dipper stick for any type of signs of damage, wear, or splitting. Evaluate the eliminated pivot pins for straightness, excessive wear, or deterioration. Inspect the problem of the bushings within the dipper stick braces. Tidy all disconnected hydraulic fittings and ports. Store the removed pins, retainers, and any associated hardware securely, labeling them for future reinstallation if needed. Carry out a final aesthetic sweep of the workplace to make certain all devices, elements, and possible risks are removed. This organized technique guarantees the mechanical thumb is removed successfully and securely, minimizing downtime and risk during the treatment. Constantly validate the equipment’s hydraulic system for leakages and correct function throughout succeeding procedure before returning the excavator to full service.